ImageSwicher is an View and it provides smooth switching between 2 images and provide animation between images.
Here Below Example shows how to create ImageSwicher view Example.
UI Layout(imageswitcher_layout.xml)
Create layout in res/layout folder and copy below code
<?xml version="1.0" encoding="utf-8"?>
<LinearLayout xmlns:android="http://schemas.android.com/apk/res/android"
android:layout_width="fill_parent"
android:layout_height="fill_parent"
android:orientation="vertical" >
<Gallery
android:id="@+id/Gallery"
android:layout_width="fill_parent"
android:layout_height="wrap_content" >
</Gallery>
<ImageSwitcher
android:id="@+id/ImageSwitcher"
android:layout_width="fill_parent"
android:layout_height="fill_parent" >
</ImageSwitcher>
</LinearLayout>
Android Activity(ImageSwitcherView.java)
package com.androidsurya.imageswicherexample;
import android.app.Activity;
import android.content.Context;
import android.os.Bundle;
import android.view.View;
import android.view.ViewGroup;
import android.view.ViewGroup.LayoutParams;
import android.view.animation.AnimationUtils;
import android.widget.AdapterView;
import android.widget.AdapterView.OnItemClickListener;
import android.widget.BaseAdapter;
import android.widget.Gallery;
import android.widget.ImageSwitcher;
import android.widget.ImageView;
import android.widget.ViewSwitcher.ViewFactory;
public class ImageSwitcherView extends Activity implements ViewFactory {
Integer pictures[] = { R.drawable.city, R.drawable.citybridge,
R.drawable.school, R.drawable.friends };
ImageSwitcher imageSwitcher;
ImageView imageView;
Gallery gallery;
/** Called when the activity is first created. */
@Override
public void onCreate(Bundle savedInstanceState) {
super.onCreate(savedInstanceState);
setContentView(R.layout.imageswitcher_layout);
imageSwitcher = (ImageSwitcher) findViewById(R.id.ImageSwitcher);
imageSwitcher.setFactory(this);
imageSwitcher.setInAnimation(AnimationUtils.loadAnimation(this,
android.R.anim.fade_in));
imageSwitcher.setOutAnimation(AnimationUtils.loadAnimation(this,
android.R.anim.fade_out));
gallery = (Gallery) findViewById(R.id.Gallery);
gallery.setAdapter(new ImageAdapter(this));
gallery.setOnItemClickListener(new OnItemClickListener() {
@Override
public void onItemClick(AdapterView<?> parent, View view,
int position, long id) {
imageSwitcher.setImageResource(pictures[position]);
}
});
}
public class ImageAdapter extends BaseAdapter {
private Context ctxObj;
public ImageAdapter(Context c) {
ctxObj = c;
}
@Override
public int getCount() {
return pictures.length;
}
@Override
public Object getItem(int arg0) {
return arg0;
}
@Override
public long getItemId(int arg0) {
return arg0;
}
@Override
public View getView(int position, View convertView, ViewGroup parent) {
imageView = new ImageView(ctxObj);
imageView.setImageResource(pictures[position]);
imageView.setScaleType(ImageView.ScaleType.FIT_XY);
imageView.setLayoutParams(new Gallery.LayoutParams(150, 150));
return imageView;
}
}
@Override
public View makeView() {
imageView = new ImageView(this);
imageView.setScaleType(ImageView.ScaleType.FIT_CENTER);
imageView.setLayoutParams(new ImageSwitcher.LayoutParams(
LayoutParams.FILL_PARENT, LayoutParams.FILL_PARENT));
imageView.setBackgroundColor(0xFF000000);
return imageView;
}
}
Register Activity in Android Manifest File
<activity
android:name="com.androidsurya.imageswicherexample.ImageSwitcherView"
android:label="@string/app_name" >
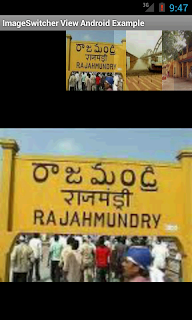
Output Screenshot


For More information about : Android Developers site
Here Below Example shows how to create ImageSwicher view Example.
Create layout in res/layout folder and copy below code
<?xml version="1.0" encoding="utf-8"?>
<LinearLayout xmlns:android="http://schemas.android.com/apk/res/android"
android:layout_width="fill_parent"
android:layout_height="fill_parent"
android:orientation="vertical" >
<Gallery
android:id="@+id/Gallery"
android:layout_width="fill_parent"
android:layout_height="wrap_content" >
</Gallery>
<ImageSwitcher
android:id="@+id/ImageSwitcher"
android:layout_width="fill_parent"
android:layout_height="fill_parent" >
</ImageSwitcher>
</LinearLayout>
Android Activity(ImageSwitcherView.java)
package com.androidsurya.imageswicherexample;
import android.app.Activity;
import android.content.Context;
import android.os.Bundle;
import android.view.View;
import android.view.ViewGroup;
import android.view.ViewGroup.LayoutParams;
import android.view.animation.AnimationUtils;
import android.widget.AdapterView;
import android.widget.AdapterView.OnItemClickListener;
import android.widget.BaseAdapter;
import android.widget.Gallery;
import android.widget.ImageSwitcher;
import android.widget.ImageView;
import android.widget.ViewSwitcher.ViewFactory;
public class ImageSwitcherView extends Activity implements ViewFactory {
Integer pictures[] = { R.drawable.city, R.drawable.citybridge,
R.drawable.school, R.drawable.friends };
ImageSwitcher imageSwitcher;
ImageView imageView;
Gallery gallery;
/** Called when the activity is first created. */
@Override
public void onCreate(Bundle savedInstanceState) {
super.onCreate(savedInstanceState);
setContentView(R.layout.imageswitcher_layout);
imageSwitcher = (ImageSwitcher) findViewById(R.id.ImageSwitcher);
imageSwitcher.setFactory(this);
imageSwitcher.setInAnimation(AnimationUtils.loadAnimation(this,
android.R.anim.fade_in));
imageSwitcher.setOutAnimation(AnimationUtils.loadAnimation(this,
android.R.anim.fade_out));
gallery = (Gallery) findViewById(R.id.Gallery);
gallery.setAdapter(new ImageAdapter(this));
gallery.setOnItemClickListener(new OnItemClickListener() {
@Override
public void onItemClick(AdapterView<?> parent, View view,
int position, long id) {
imageSwitcher.setImageResource(pictures[position]);
}
});
}
public class ImageAdapter extends BaseAdapter {
private Context ctxObj;
public ImageAdapter(Context c) {
ctxObj = c;
}
@Override
public int getCount() {
return pictures.length;
}
@Override
public Object getItem(int arg0) {
return arg0;
}
@Override
public long getItemId(int arg0) {
return arg0;
}
@Override
public View getView(int position, View convertView, ViewGroup parent) {
imageView = new ImageView(ctxObj);
imageView.setImageResource(pictures[position]);
imageView.setScaleType(ImageView.ScaleType.FIT_XY);
imageView.setLayoutParams(new Gallery.LayoutParams(150, 150));
return imageView;
}
}
@Override
public View makeView() {
imageView = new ImageView(this);
imageView.setScaleType(ImageView.ScaleType.FIT_CENTER);
imageView.setLayoutParams(new ImageSwitcher.LayoutParams(
LayoutParams.FILL_PARENT, LayoutParams.FILL_PARENT));
imageView.setBackgroundColor(0xFF000000);
return imageView;
}
}
Register Activity in Android Manifest File
<activity
android:name="com.androidsurya.imageswicherexample.ImageSwitcherView"
android:label="@string/app_name" >
Output Screenshot


For More information about : Android Developers site


